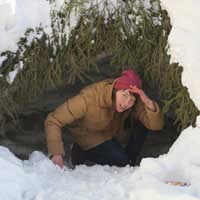
Making a Survival Shelter

When faced with a survival situation the thoughts of many an inexperienced adventurer will turn to food, water and maybe even fire but, in doing so, they’ll have neglected to think about the most important priority in survival which is to find a suitable place to shelter. If you’re very fortunate, you may just get lucky and find some kind of cave or hollow which may provide you with just the shelter you’ll need. But, if not, you’re going to have to build a shelter yourself.
Considerations
Before you start building your shelter, you need to take some things into consideration:- How long will it take to build?
- Will it protect you from the elements you’re likely to experience, e.g. wind, rain, sun, snow?
- Do you have the tools to build it and, if not, can you craft the relevant tools out of surrounding materials?
- Can it be located close to a fire and a water source?
- If there’s a ‘natural’ shelter which basically needs modification, are animals or dangerous insects already occupying it?
Debris Hut
The debris hut is a popular type of shelter for a general forest or jungle type location where you might find yourself in a survival situation.This is one of the more popular shelters to build as it’s good for keeping warm and is fairly easy to construct. To build it, make a tripod with 2 short stakes and a longer ridgepole or, alternatively, simply place one end of a large ridgepole on top of a solid base. The ridgepole should run the length of your shelter and can be secured by the tripod method or by anchoring it at about waist height to a tree.
To make a wedge-shaped ribbing effect, prop large sticks along both sides of the ridgepole. The important thing to remember here is that the ribbing should be wide enough for you to fit inside it and steep enough to let rainfall drain. Then you need to create a latticework by weaving thinner sticks and brush crosswise on top of the ribbing. This prevents the insulating material which you’ll place on top and which could consist of leaves, grass and pine needles from falling through the ribbing and on top of you. This insulating material that you place on top should be about a metre thick but if there’s an abundance of it in the area, the thicker you make it, the better the insulation.
On top of that, place some branches to prevent the insulation material from blowing away if it gets too windy or in the event of a storm. Don’t forget to save some insulation material for the ‘door’ or entrance. This should be pulled in behind you to close the entrance to your shelter, once you’re inside.
There are numerous other designs based on tepees, pits, lean-tos etc. and ways of building suitable shelters on beaches, on boggy marshland, in deserts and on snow. In general, however, you should be looking to build a shelter in areas which offer a natural formation conducive to shelter construction. In a forest or mountainous environment, this can include caves, rock crevices, large trees with low hanging branches, fallen trees with thick branches, bushy areas and small depressions.
Areas to be wary off are narrow valleys, creek beds or ravines. This is because as they are lower down, the air will be colder and you’re also more at risk of flooding. Lower ground also attracts more insects. Before you site your shelter, however, check for things like ticks, ants, mites, mosquitoes etc. and depending on where you are you might care to look out for scorpions and snakes as well, though not so much in the UK!
Finally, as well as the creepy crawlies on the ground, look overhead to make sure there is no danger from loose rocks, dead branches or anything else that could fall on top of your shelter and injure you.


Re: How to Get Out Of A Mud Bog (Quicksand)
I was 8 years old, my family went to visit our neighbors where we previously lived in Tool,Texas. The family had…
Re: How to Get Out Of A Mud Bog (Quicksand)
I was sinking in a mud bog yesterday for 3 hours until I was pulled out. How do I cope now?
Re: Dangers and Benefits of Leeches
Can it penetrate completely into the body through navel ? If, then how one can know that it has entered into body ? And what…
Re: How To Survive A Forest Fire
I like cheese.... ????????????????????????????
Re: Dangers and Benefits of Leeches
The easiest way to remove a leech from skin is just by sprinkling salt over the leech which would immediately detaches itself…
Re: Dangers and Benefits of Leeches
I'm 14 and was swimming st Brady's run in beaver county and I got bit by a leech.. I would of never knew unles my boyfriend…
Re: What Are Survival Seeds?
The other evening, I found all my matches were damp and I had to ignite my wood burning stove using a rolled up piece of paper and my…
Re: Where Can I Try Out my Survival Skills?
i been doing some survival practise is my back garden but i could use some new bet cheap and relieable gear. thank you
Re: Surviving in the Desert
Hi I am in the process of doing research for a novel. The main characters are trapped in a desert and there is an on coming sandstorm.…
Re: How to Start a Fire
So lets just say, I am aware this sounds crazy but hear me out, what if there was a zombie apoccolypse (Have no frickin idea how to spell…